

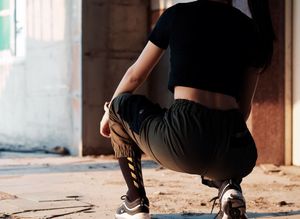


It's that time of the week again - Saturday morning. The sun is out, the birds are chirping, and the golf course is finally thawing out. As you retrieve your clubs from the garage, you notice that your shoes have seen better days. But never fear! With this step-by-step guide, you'll have your golf shoes looking (and smelling) as good as new in no time.
What You'll Need
Before we get started, there are a few things you'll need to gather. For this project, you'll need:
- A soft-bristled brush (an old toothbrush will work in a pinch)
- A mild soap (dish soap is fine)
- A bucket
- A towel or cloth
- Old Newspaper (optional)
- Shoe polish (optional)
- Shoe Tree (optional)
Got everything? Great! Let's get started.
Step One: Remove the Laces and Insoles
The first thing you need to do is remove the laces and insoles from your shoes. This will make it easier to reach all of the nooks and crannies where dirt and grime like to hide. If your shoes have removable spikes, now would be a good time to take them out as well. Once everything is out, give your shoes a quick once-over with the brush to remove any loose dirt and debris.
Step Two: Clean the Outside
Now it's time to tackle the outside of your golf shoes. Fill a bucket with warm water and a mild detergent. Mix things around until suds start to form. Wet down your cloth or towel with the soapy water.
Next, start scrubbing away the dirt and grime on your shoes. Be sure to pay extra attention to any areas that look especially grimy. When you're finished scrubbing, you can use a damp cloth to dab off the extra soap residue.
Step Three: Clean the Inside
Next up: The inside of your golf shoes! Just like with the outside, start by wetting down your cloth or towel before adding a few drops of soap. Once again, scrub away any dirt or stains until they disappear. When you're done cleaning, be sure to wipe off any soap residue before moving on to the next step.
Step Four: Let Them Air Dry
Once you've cleaned both the inside and outside of your golf shoes, it's time to let them air dry. If possible, try to find a shady spot where they won't be in direct sunlight—sunlight can cause the shoe to prematurely age.
If the shoes are still wet, add newspaper for 20-60 minutes to soak up the moisture. When the damp newspaper is removed, replace it with shoe trees so your shoes don't lose their shape.
Step Five: Add Some Polish (Optional)
If you really want your golf shoes to shine, consider adding a coat of polish once they're dry. Shoe polish not only makes your shoes look great but also helps protect them from dirt and water damage. Just apply a thin layer of polish with a soft cloth and buff it out until you're happy with the results. We recommend using shoe polish that matches the color of your shoes so that any scuffs or scratches are less noticeable.
Step Six: Put Everything Back In
Once your golf shoes are dry (and polished), it's time to put everything back in—insoles, spikes, and laces included!
And there you have it! A quick and easy guide to cleaning golf shoes like a pro. Just remember: The key is being consistent; aim for giving your golf shoes a good cleaning after every round (or at least every other round). With regular care and maintenance, they'll stay looking great for years to come!
If you find that no matter how hard you try, your shoes can never seem to stay completely dry, then you need to see the latest and greatest in waterproof golf shoes!

Member discussion